Sunday, July 28, 2013

DIY Bird Seed Cakes

Here's a fun project for the kiddos...we've made a few this week! The first ones were small, and were gone in a matter of hours, so we made yesterday's seed cakes MUCH bigger! I used Gladware containers as molds. Our birds LOVE them! We see a lot of bluejays, crows, sparrows & woodpeckers frequenting our bird buffet:) Squirrels seem to enjoy this one too!


Here's what you need:

4 C Water
Bird seed (any variety is fine)
4 Packets unflavored gelatin
1 1/2 C Peanut butter
1 C Shortening
1/2 C Light corn syrup
Heavy twine or braided nylon
Containers to use as molds (Gladware quart containers & small cake pans work well)
Cooking spray
Wax paper

Directions:
On stove, heat water, not quite to boiling, & mix in gelatin until it's dissolved. Add peanut butter, corn syrup & shortening, stirring until those are all melted. Take off heat, let mixture cool for a few minutes, then mix in your bird seed. I didn't specify an amount, but mix in the bird seed until the mixture doesn't have any excess liquid in it.

Use the cooking spray on the inside of molds, then spoon mixture into each mold, until they're about 3/4 full. Take your twine & make a loop with a pretty big knot on the end (this will help ensure it doesn't fall out when you hang the seed cake). Push the knot into each mold, then fill up the remaining space in the mold, with a few inches of loop coming out of the top. After the molds are full, use the wax paper to push down & pack mixture tightly into mold. 

Put the molds in the freezer for a few hours, or until they are very firm. Pull them out of the molds (if you have trouble pulling them out, run the mold under hot water for a few seconds...they'll slide right out!).

Hang them outside for your birds & squirrels to enjoy! 

Thursday, April 4, 2013

Whip It...Whip It Good

I thought about calling this post "I Whip My Coconut Oil Back & Forth", but as I am a product of the 80's, the Devo reference won the coin toss.

Being a HUGE fan of DIY projects & products that are easy, save me money & work really well, you have no idea how excited & downright giddy I was when I discovered coconut oil a couple of years ago when I was making a bunch of sugar scrub to package as Christmas gifts. Since then, I've used it off & on for a few things, but just recently discovered the very diverse range of uses for coconut oil, as well as its amazing health benefits.


Because there are SO many uses & benefits to using coconut oil, I'm only going to focus on a few things I have personally used it for, as well as post the two "recipes" I did today. But, if you'd like to explore more uses, I'm posting a very informative link here, so explore away!


What I use it for:


Facial Moisturizer

I confess...I like coconut oil so much that I've given up buying any kind of face cream at the store. It's light, and it absorbs into the skin almost instantly, so you don't feel like you are wearing a layer of grease (ick!). A little goes a long way, so you don't need to use much for your face to feel soft and smooth. 

Eye Makeup Remover
What can I say? It works great for getting eye makeup completely off gently, without any irritation or burning.

My Hair
I've been growing my hair out for almost a year now, and I'm always worrying about getting split/dry ends. Twice a week, on a night before I know I'm going to wash it the next morning, I slather coconut oil from about 4" from the ends all the way out. And I do mean SLATHER. Don't be afraid to us a lot- you're washing it the next day, so it's ok;) I put it in a ponytail on top of my head & wrap some plastic wrap around it to keep from getting it on my pillow. I can tell a big difference in the overall health & smoothness of my hair, so I'm going to keep right on using it!

I know a lot of people who either have ethnic hair, or have children with ethnic hair are big believers in coconut oil for healthy hair. Also, if you have naturally curly hair that tends to frizz, you can rub a TINY amount on your hands & run it through your hair as a leave-in. Be careful not to overdo it, or your hair will look visibly greasy!

Daily Skin Moisturizer
Coconut oil has this super-fabulous property where it's a solid at room temperature, but melts almost instantly when it hits your skin. It also absorbs into the skin very quickly, which is nice because you don't feel like stuff is sticking to you as you're walking around.

Also, as an added bonus, just the other day I found this blog post regarding coconut oil getting rid of Keratosis Pilarsis (I know, I'd never heard of it either, but it turns out I have it, I just didn't realize it had a name), which is the small bumps or "chicken skin" on the back of the upper arms and/or thighs. I've been using it on my arms anyway, and the Keratosis Pilarsis seems to be all but disappeared. Score!!!!

Facial Exfoliator
In the palm of your hand, mix some coconut oil with a tablespoon or two of baking soda & scrub away! It's a mild, yet very effective way to get rid of dead skin cells & other gunk that accumulates on our face. Don't get it in your eyes though...baking soda stings!

Feet
I hate that pre-Spring anxiety when you know it's almost time for flip-flops, sandals & open-toed shoes, but your feet look like they belong to some sort of dry, cracked, scaly reptilian creature whose feet would frighten small children & some adults. No worries....coconut oil works great for that too! 

Lips
Coconut oil makes a great lip moisturizer & can even be tinted to add some color (see post below).


Now for another amazing discovery about coconut oil....wait for it...wait for it...
It can be WHIPPED!!!!

Say what? Whipping coconut oil? It's madness...sheer lunacy...that's crazy! Ok, so I get a little excited & giddy about stuff like this. Don't judge.

So, today I thought I'd get out my electric mixer & create some body butter using whipped coconut oil. I was thinking of what scents/flavors would complement the yummy coconutty (is that even a word?) smell of coconut oil, and here are the three I came up with, based on what I had on hand:

*Coconut-Orange (This one is by far my favorite...it smells AMAZING!!!)

*Chocolate-Vanilla-Coconut (Use just a little cocoa powder, using too much can stain clothing or other fabric. This one also smells good!)

*Peppermint-Coconut (I wasn't sure if this combo would work, but it's surprisingly refreshing!)

What You'll Need
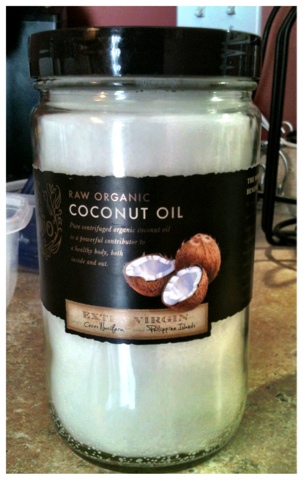
Organic Raw Extra Virgin Coconut Oil 
(you can get it at any health food store; do NOT skimp on this, it's pricey (about $19-$26 for a 16oz jar, but it goes a long way & cheaper coconut oils are often hydrogenized or processed with who knows what)
Large mixing bowl
Smaller bowls for mixing in flavors 
(to divide whipped oil into however many flavors you're making)
Mason jars with lids to store final product
Electric hand mixer, or a stand mixer
Essential oils, extracts or flavors you'd like to make your body butter
(Essential oils are also pricey, but again, a little goes a very long way. If you really want to save money here, keep it simple & use vanilla extract or peppermint extract, which are both very reasonable)


Directions
This is SO easy to do! Use a sturdy metal spoon to scoop your coconut oil out of the jar & into the large mixing bowl. Once you've got it all in the bowl, mash down the bigger chunks, then turn it on & start mixing! Mix the coconut oil on high until it's fluffy & creamy.


Divide your whipped coconut oil among the smaller bowls, then add your flavors to each one & use a fork to mix them in until incorporated. There is no set amount to how much flavor/scent you use; it's really up to you. Especially when using the essential oils, I'd advise starting with just a few drops, then mix & add more until the strength is where you want it. Those oils are very  strongly concentrated, so it's easy to accidentally overdo it.


Put in mason jars & enjoy, or they make really great gifts:)

TINTED COCONUT OIL LIP BALM
The other concoction I made today was coconut oil tinted lip balm. Let me preface this by saying that one of my FAVORITE stores in the whole world is Sephora. All they sell is makeup & hair products, so, yeah...right up my alley. I was in there a few months ago buying Bare Minerals makeup, which I love, and the sales girl was telling me that their makeup is all made with pure pigment, so you can use it to color/tint other things (lip gloss, even nail polish!), so that's what I used for this lip balm. I used two of the blush colors- one is a coral & the other is a really bright pink, and I mixed them with the coconut oil to get a really nice "Springy" color. Again, anything with pure pigment goes a long way, so start small & add more as you go. You could use the whipped coconut oil if you want, but I just mashed it up & mixed it with a fork. It worked great! Then I put it in a small container that had a miniscule amount of eye cream left in it that I just washed out. Ta-da.....


Feel free to try any or all of these suggestions & let me know what you think!


Friday, March 8, 2013

My Favorite Non-Classy Appetizer...

Have a casual function to go to & need an easy, delicious appetizer recipe that's also great for a laugh or two?

Meet "Redneck Sushi".

Slather some cream cheese on a couple of squares of corned beef, put a pickle spear on it, roll it up & slice.

It's no-fail, and your Uncle Festus & Aunt Lurlene will LOVE it.

Yee. Haw.

Enjoy!


Wednesday, February 27, 2013

Super Cute Little Girl Hairstyle

For those of you who don't know me, I have a 3 year-old daughter who has a lot of hair. No, seriously, the child has enough hair for three kids...but it's a blessing, because it's beautiful, thick & has those gorgeous loose, bouncy curls that we ladies would all love to have.

Luckily, I have ALWAYS loved styling hair, and I have a bit of a knack for it, so my Little Lass & I are a great match! I'm always looking for cute new styles to try on her, and my sister sent me this picture tutorial, so today we gave it a whirl!

It's not nearly as hard as it looks, but it does require that you know how to do a French braid. I have my own technique for French braiding that I taught myself on a doll when I was in fifth grade, and I've done it that way ever since. Someday soon, I'll post a tutorial on that...

Here's the tutorial pic on today's style. I have no idea who the original poster was, or I'd give them credit.


And here is our finished product...love it! As you can see above, she finishes out the whole braid at the end, which I never do. I like to finish it at the base of her neck, put in a tight elastic pony & a bow, then let her curls hang down loose.


Monday, February 25, 2013

Portable Enchiladas, You Say?

One of my current obsessions is food, other than muffins, made in a muffin tin. Sometimes it really is the little things! First of all, let's face it...mini-meals are cute. Secondly, kids like them because they're easy to eat & less messy, which we moms love too! Finally, you can make a lot of them, freeze what you don't eat, then reheat them as needed, so leftovers & snacks are a breeze! There really is no down side to making meals this way, in fact, check out this awesome blog with an entire section devoted to muffin tin meals. I used three of the recipes last week & they were all great!

So....on to tonight's dinner! I've made muffin tin tacos before, and they're great, but this week I started wondering if I could do muffin tin chicken enchiladas...why not? They actually turned out really good & I've got plenty left over to put in the freezer. This recipe makes 24 mini-enchiladas, and they would also make great party appetizers or game day snacks!


INGREDIENTS:
2 lbs. boneless, skinless chicken breasts
6 C water
3 packages taco seasoning
24 flour tortillas (soft taco size)
1 can red enchilada sauce
1 package queso fresco, crumbled (in the Mexican food section of grocery store)

DIRECTIONS:
The chicken breasts can either be cooked for several hours in the crock pot, or you can boil them on the stove, whichever you prefer. I used the stove this time.
Put 6 C of water in a large pot, mix in all 3 packages of taco seasoning & the 2 lbs. of chicken breasts, then bring to a boil. Turn down to medium-low & let simmer for 1 1/2 hours. This lets the chicken get really tender so it just falls apart. *FYI, this shredded chicken is AWESOME for chicken tacos, taquitos & quesadillas...I use it all the time & it's a no-fail!

While the chicken is cooking, get your tortillas ready! They'll need to be cut down a little to fit into the muffin tin, roughly a 5" diameter circle works fine. I just use a bowl that's roughly 5" across, then cut around it (you can do 4-5 tortillas at a time with a decent knife).


After you get all 24 circles cut, you'll need to soften them in the microwave. Get a clean dishtowel wet, wring it out, then you can wrap 4 circles at a time in it & microwave for 1 minute. After nuking each batch of 4, put them in the muffin tin as shown.


When the chicken is done, use a couple of forks to shred it into a bowl, then discard most of the leftover juice (you can use a few TBS of the juice to keep the chicken moist, but not too much, or your tortillas will get mushy). Distribute shredded chicken evenly among the 24 tortilla cups, then top each one with a spoonful of enchilada sauce & some crumbled queso fresco.


Bake in a preheated 350-degree oven for 20 minutes. Leftover enchiladas can be wrapped & put in a plastic bag in the freezer for reheating later- the microwave works great for that:)

Enjoy!


Sunday, February 24, 2013

Best Cookie Recipe Ever...

I'm a sucker for a great cookie recipe, especially chocolate chip! This is one that I've made over and over again & it never disappoints! I originally found it a few years ago on one of the recipe sites, but I tweaked some of the ingredient amounts & added the toffee chips. Occasionally, I'll even double the recipe & freeze half the dough to bake later. I'm not sure if it's the vanilla pudding or what, but these always turn out soft, dense & absolutely delicious! 


SOFT CHOCOLATE CHIP TOFFEE COOKIES
2-1/4 cups all-purpose flour
 1 teaspoon baking soda
 1 cup butter, softened
 3/4 cup packed brown sugar
 1/4 cup white sugar
 1 (3.4 ounce) package instant vanilla pudding mix
 2 eggs
 1 teaspoon vanilla extract
 2 cups semisweet chocolate chips*
1 package Heath Toffee Bits

*I'm a chocolate snob, and I use Ghirardelli 60% cacao chocolate chips:)

DIRECTIONS
Preheat oven to 350 degrees
Sift together the flour and baking soda.
In separate bowl, cream together the butter, brown sugar & white sugar. 
Beat instant pudding mix until blended. 
Stir in eggs and vanilla. 
Blend in the flour mixture. 
Finally, stir in the chocolate chips & toffee bits. 
Drop cookies by rounded spoonfuls onto ungreased cookie sheets.
Bake for 10 to 12 minutes.
Edges should be golden brown- do not overbake!
Enjoy:)

Saturday, February 23, 2013

You want HOW much for that???

I recently saw a post on Pinterest for a DIY wine rack made out of a pallet, and I LOVED it! After all, you can get pallets for free (as in $0) from most home improvement or warehouse-type stores, and as much as I crave a good bargain, getting something for free makes me absolutely giddy! The guy at Lowe's even loaded 4 of them into my van for me a few months ago for a table project I was doing.

As I coveted the aforementioned wine rack, I remembered that I still had an extra pallet out in my garage. The project sounded easy enough, so I decided to tackle it for my husband's Valentine's Day present. We're bursting at the seams in our small house, so I'm a big believer in practical, stylish space-savers, and our existing wine rack just took up a lot of unnecessary space.

This turned out to be one of the easiest projects I've ever done, and it looks great! Including staining & mounting it to the wall, it took me about 2 hours from start to finish. And as I already had all of the materials, it cost me nothing to make. Zip, zero, nada....

Oh, and someone is selling these "made to order" wine racks on Etsy. They look EXACTLY the same as the one I made. See the post here.

Wait for it...

Wait for it...

And they are charging $80 plus shipping. SAY WHAT???

Ok. Here are the directions for your free (or extremely cheap, if you don't already have all the materials) wine rack.

WHAT YOU'LL NEED:
1 wood pallet
Screws
Stain or paint
Sanding block
Hammer
Drill
Saw (my corded, hand-held reciprocating saw worked great!)
Wine bottles to put in your new wine rack!

DIRECTIONS:
Make sure your wood is dry & free from bugs, and saw across about the top 1/3 of the pallet (it's easy to see what I mean from the picture)
You'll also need to remove two boards from the remaining pallet, using your hammer to pry them off. One board is to attach to the bottom of your wine rack & one will attach to the back (behind where the bottoms of the wine bottles would go).
Use your drill & screws to attach the two extra boards.
Now, sand your wine rack. If you want it completely smooth, go for it, but I just focused on the sides & corners because I like the "rough wood" look for stuff like this.
Stain or paint whatever color you like & let it dry.
Now hang it on the wall- you can use whatever method you like to mount it. I used extra-long drywall screws to drill right through it into the studs, so that puppy isn't coming down for anything!
Load up your wine bottles & you're good to go:)